
Alvion T.
I am a wife, mother, and businesswoman. Alvion’s creations promise to deliver unique and high-quality products that spark the imagination and inspire creativity. We are committed to providing exceptional customer service and creating a brand that our customers can trust and rely on for years to come.
Introduction
Imagine stepping out of your shower and enveloping your skin in a cloud of pure luxury. Yes, we’re talking about whipped body butter, the stuff of skincare dreams!

Curious to whip up your own potion of silky goodness that your skin will thank you for? You’re in the right place! Get ready for a DIY adventure that will leave your skin feeling as soft as a kitten’s fur.
Unraveling the Myths

Before we dive into the enchanting process, let’s debunk a myth or two.
- Whipped body butter isn’t just for spa days or special occasions. No siree! Your skin deserves a daily dose of decadence. And guess what? Making it yourself doesn’t require a magician’s hat or a chemistry degree.
Benefits that Make Your Skin Sing

Picture this: your skin glowing like it just came back from a tropical vacation. Shea butter and cocoa butter, the dynamic duo in our recipe, team up to lock in moisture and wave goodbye to dryness.
Say hello to a complexion that’s as radiant as your smile after a chocolate bar.
The DIY Delight

Alright, let’s get hands-on! Whip out your mixing bowl (pun intended), gather your ingredients, and channel your inner skincare glow.

We’re talking about blending that shea butter, cocoa butter, argan butter, and mango butter until they perform the ultimate skin-saving tango.

I suggest you get out your kitchen scale, metal mixing bowl, and blender/mixer. I recommend you use a silicon mixing spoons and keep parchment paper handy.


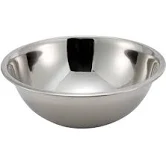
Measure all of the ingredients out first and place them in your metal mixing bowl. We will be doing the double boiler method where you will boil water in a pot and set your metal mixing bowl that’s big enough to sit on top of the pot without touching the water.
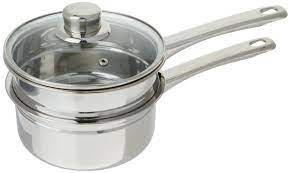
This is a process that is better than melting the ingredients in the microwave because you will lose some of the nutrients and benefits that the butters have.
If you do not have the metal mixing bowls, then the Pyrex glass pitcher will work just fine.

Once your butters have melted together, you will have a yellow tint color which is normal. Remove the bowl to a cool surface with a towel or just something to protect the countertop.
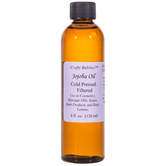
Add in your jojoba oil, essential oil of choice and arrowroot powder. I recommend tea tree essential oil because they have many healing properties for the skin. (Make sure your essential oils states on the bottle that it can be used on the skin!)

Jojoba oil has excellent skin properties that will help your skin the glow. Arrowroot powder helps removes the greasiness from the butters when you apply it to the skin.
Stir everything well and then let it cool down. I suggest putting it in the refrigerator for 2 hours or in the freezer for 30 minutes or until it solidifies.
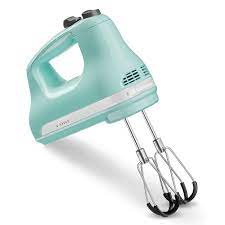
Now it’s time to blend it with the hand mixer or if you have a stand mixer. Then pour the mix in the stand mixer bowl before cooling. Blend until it increases in size like whipped cream. The color will change to white and become light and fluffy.
Now if your mixture becomes hard instantly after this, then you must blend it again and quickly scoop it out with an ice cream scoop. If the mixture is too soupy then you can refrigerate it for increments of 30 minutes to get to that desire consistency.
If your mixture comes out in a velvety smooth mix, then you can definitely use a piping bag to pipe it into any containers you want.

Recipe with a Pinch of Magic
Ingredients:
- 17 oz. raw shea butter
- 5 oz. raw cocoa butter
- 5 oz. organic mango butter
- 6 oz. argan butter
- 4 oz. organic jojoba oil
- 10-20 drops of your favorite essential oil (tea tree, anyone?)
- 3 teaspoons arrowroot powder
Method:
- Melt the shea butter, cocoa butter, mango butter, and argan butter in a double boiler.
- Remove from heat and add jojoba oil and arrowroot powder. Add those essential oil drops for an aromatherapy touch. Stir well.
- Let the mixture cool in the fridge for 30 minutes to a hour.
- Whip it (whip it good!) until you achieve a fluffy, cloud-like consistency.
- Marvel at your creation!
Unleash Your Inner Enthusiast
Once you’ve e your homemade whipped body butter, it’s showtime! Apply it like a goddess claiming her throne – massaging it onto your skin with loving intent. Watch your skin drink in the hydration and radiate the kind of glow that has everyone wondering about your skincare secret.

Conclusion
So, there you have it, the magical world of DIY whipped body butter explained. From debunking myths to creating your own spa-like experience, this journey is all about indulgence, luxury, and embracing your inner skincare artist. Now, go forth, whip up some goodness, and let your skin feel the glamour. You’re one DIY closer to skincare royalty!

Whipped Body Butta
This body butter is designed to nourish, hydrate, and transform your skin into a radiant canvas of beauty.
50 in stock
Subscribe to this post to receive more recipes like this.